Arduino is a palm-sized microcomputer used to perform basic robotic/electrical functions like turning on a light or moving an arm. While that may seem basic, Arduinos can also be used to run programs for IOT Devices (I.E. Smart Lights, Samsung Smart Fridge, etc.) since their design is so small and powerful.
Example:
My Arduino Projects:
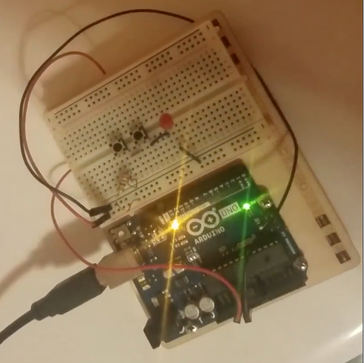
Series Circuit
This is a simple circuit where all you have to do is press the 2 buttons at the same time and it will activate the red light.
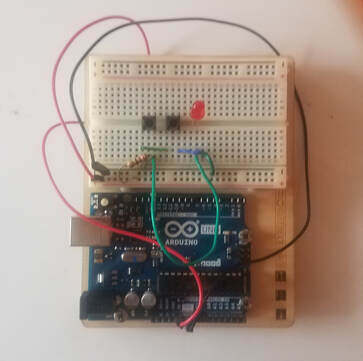
Parallel Circuit
This is essential the same circuit as above, but this time it has been reworked to where you only need to press 1 of the 2 buttons to get the light to turn on.
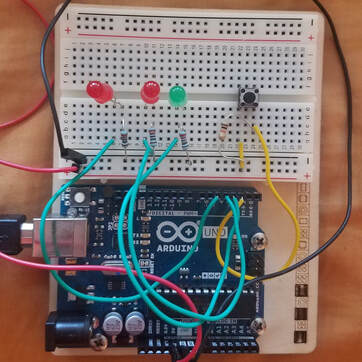
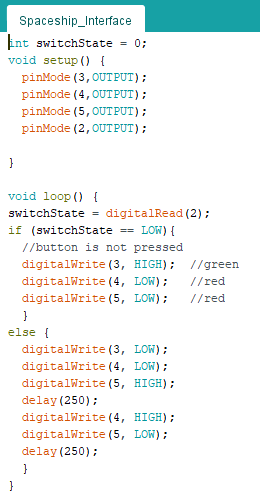
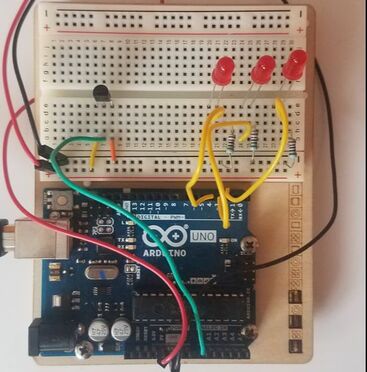
Spaceship Interface
This is another circuit but this time when you push the button, it activates the lights in a way that simulates motion: It goes red, red, green, kind of like a futuristic spaceship interface.
|
|
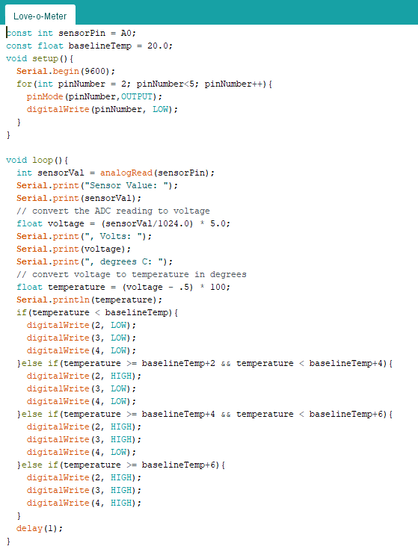
Love-O-Meter
This project featured use of the temperature sensor (i.e. the black object on the left-side of the board) in which when you would touch it, it would increase the temperature and turn on a certain number of red lights depending on how warm the temperature sensor is.
|
|
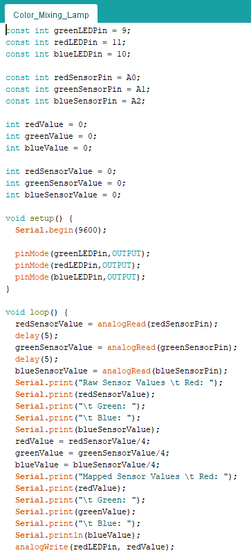
Color Mixing Lamp
This project makes use of 3 sensors on the right side of the board which each control one color: red, green, or blue (normally there is a colored slip you put over each sensor to indicate which color was which, but my kit didn't come with them). By touching one of the sensors, it would mirror that color onto the color mixing lamp on the left, and so you could mix and match with the sensors to create pretty much any color.

|
|
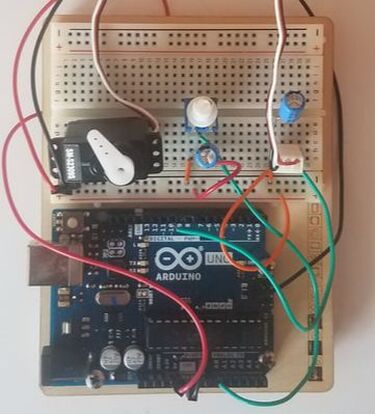
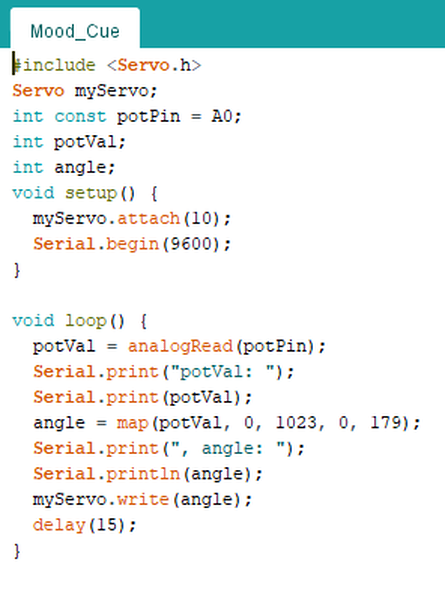
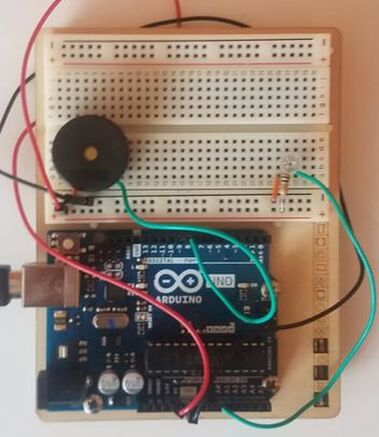
Mood Cue
The mood cue is a project that uses a servo controlled by a potentiometer to point a different things. Ideally it was supposed to point at a sign that had different moods listed, hence mood cue. When you turn the potentiometer one way, it moves the servo that way, move it again, the servo follows suit.
|
|
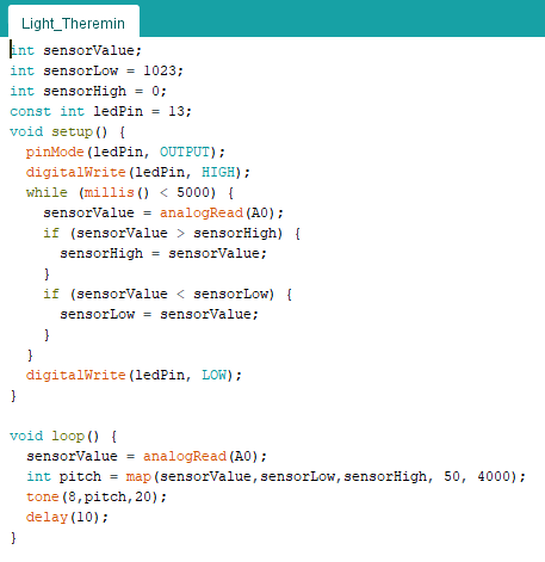
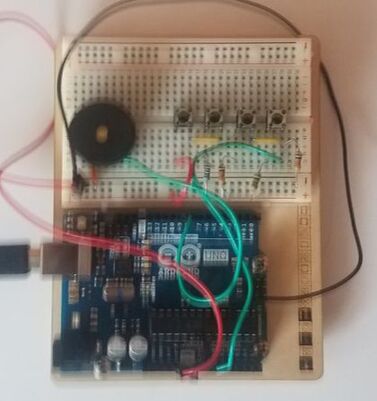
Light Theremin
This project uses a phototransistor (the clear object on the bottom right) to search for light, and covert that light into electrical signals that tell the piezo (the black disc) how loud or quiet it should be depending on the level of light.
|
|
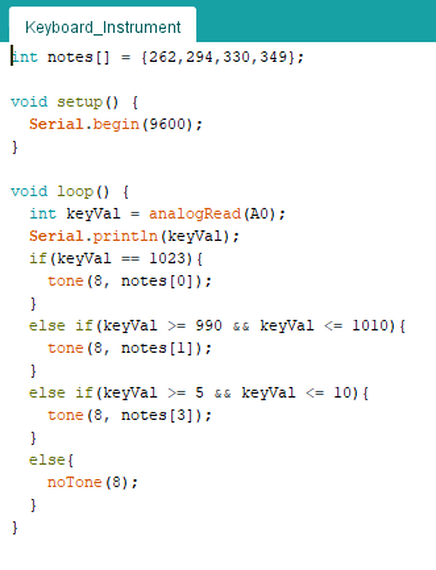
Keyboard Instrument
For this one, there were 4 buttons on the breadboard, each that when pressed would sound an electric signal to the piezo to play a certain note, like an electric piano or keyboard.
|
|
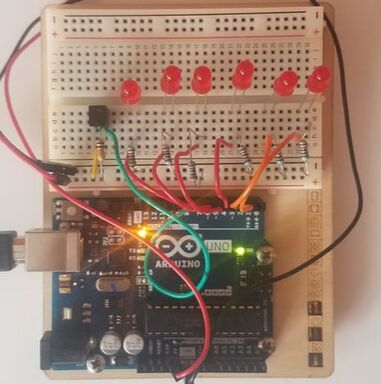
Digital Hourglass
This one is actually pretty simple: After 10 minutes, a light will turn on. Repeat 5 times (since there are 6 lights total) and that's it! If you have all of them lit up, move the tilt switch to reset them all and then redo the whole thing all over again. (Note: You Can Change The Interval In The Code To Make Then Length Shorter If You Don't Wanna Wait 10 Minutes Each Time.)
|

|
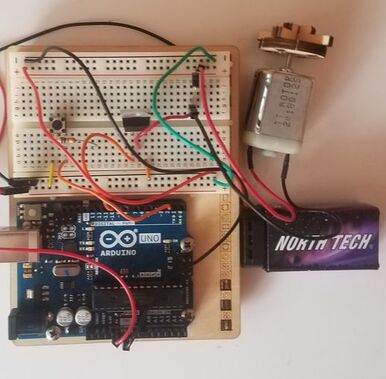
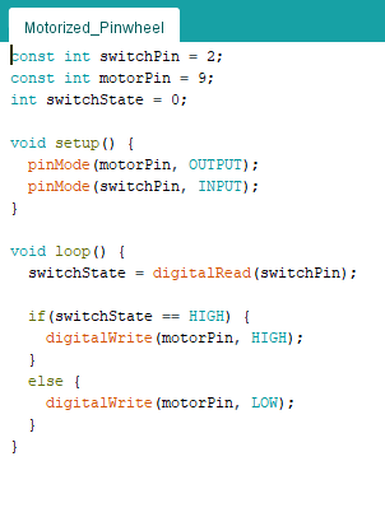
Motorized Pinwheel
For this project, as soon as you plug it in it, the motor will begin to spin. By pressing the button, you can change the speed at which the motor rotates.
|
|
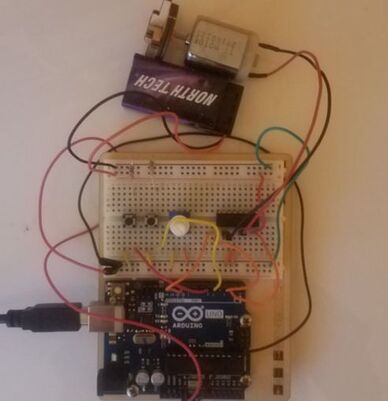
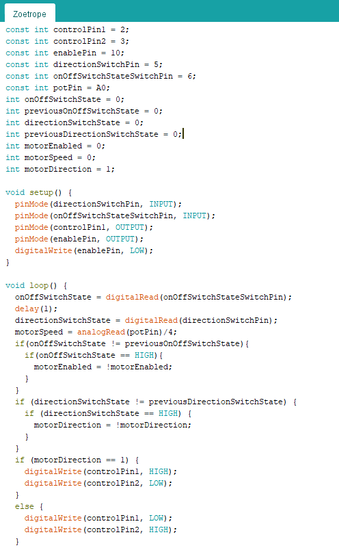
Zoetrope
Essentially what a Zoetrope is a device that spins a image that is wrapped around it in a circle so that it makes the object that is wrapped around create the illusion of motion. In this version you have 2 buttons: One that turns the motor on/off, and the other one that flips the direction that the motor turns. The white potentiometer is used to speed up/slow down the motor. If I had more time, I would've actually strapped an image to the motor to see if the illusion actually works, but alas, I just tested to see if it worked or not.
|
|
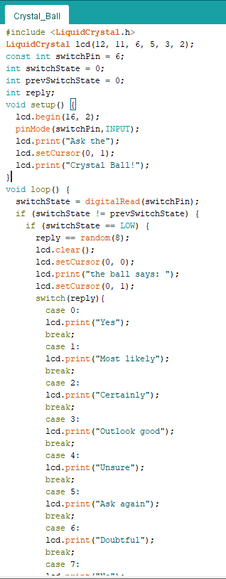
Crystal Ball
The crystal ball is an Arduino version of a magic 8-ball; by moving the tilt switch (the black object) up and down, it will emulate when you shake the magic 8-ball up and down to display results (i.e. Yes, No, Try Again, etc.). The results get displayed on the LCD screen above and you can change the contrast by rotating the potentiometer (the white object next to the switch).

|
|
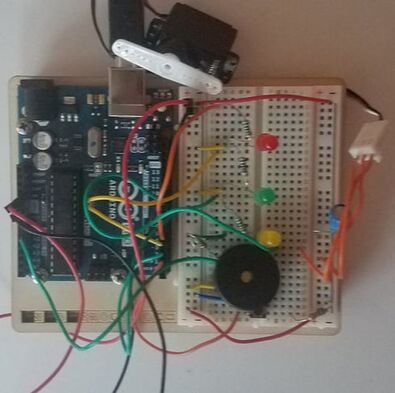
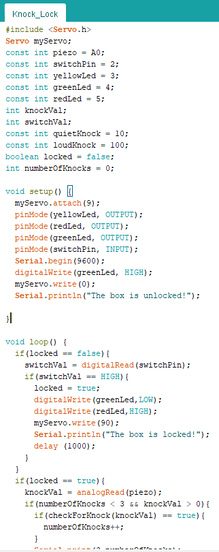
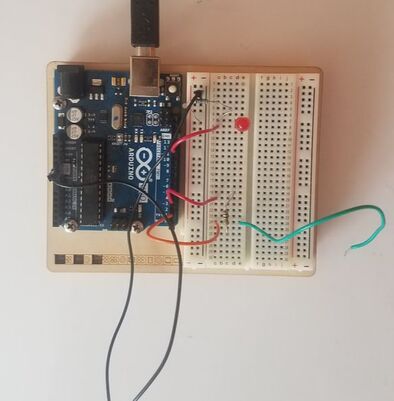
Knock Lock
The Knock Lock Involves tapping on the piezo (not the button which is what I thought at first) with different intensities try and get the servo to move. You'll know you've done this correctly when the led, that starts out green for unlocked, changes to yellow, which means that you knocked correctly. However, you're still not done because in order to get the servo to lock, you must knock a certain number of times. You'll know when you've reached the right number because the red led will light up, indicating that the servo has locked.
|
|
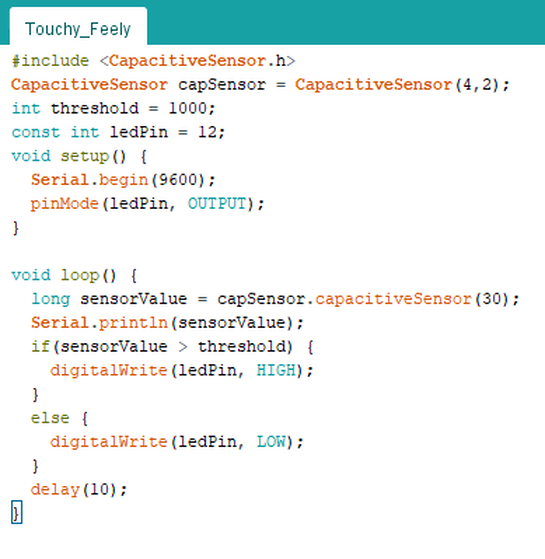
Touchy Feely
|
|
Summary
I haven't been to Hell (Michigan. Yes there is a place called Hell, Michigan. Look it up) but I'm pretty sure It would include Arduino. I have had nothing but trouble with these Arduino project including wires constantly breaking, missing items, poorly written code, unrealistic images of how the project should work, a lackluster IDE, and everything in-between! I don't know if I was extremely unlucky, or if Arduino is made even cheaper than the average Chrysler, but I have had no enjoyment over the course of the semester with Arduino. HOWEVER, I did learn a couple of things out this debacle: I have gained a better understanding of how electricity works, though I already know how to code, I now know another language (C++ I believe), and I also learned how to remove broken wires from tight spaces (i.e. the breadboard). All in all if I had the choice, would I still continue to do Arduino projects? The Answer is a frim NO.
