Inventor is a CAD-based program that allows the user to create anything in both 2 and 3 dimensions. Many of the people who use this program use it to create 3D-printed models to simulate in their businesses.
My Work In Inventor:
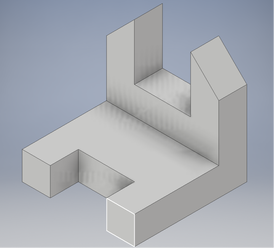
Figure 1
|
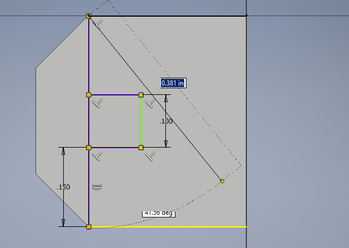
Figure 2
|
What you see in-front of you is a "Widget". A Widget is a polyhedron-based tiny gadget/mechanism whose name is either unspecified or unknown.
How To Create A Widget
Step 1: Find the isometric sketch of the one you want (see Figure 3)
Step 2: Open Inventor and create a new part file for it (.ipt)
Step 3: Begin drawing the Widget (HINT: Each square on the isometric graph paper = .25 in) (See Figure 2)
Step 4: Once you are done drawing the widget, save the file as .stl file type and export it to your thumb drive
Step 5: Open "MakerBot Desktop" and click File -> Add
Step 6: If you dimensioned your widget correctly then it should be very small, to fix this click the Scale Object button; the 2-squares button on the left side of the window (HINT: it looks like the chromecast symbol) (See Figure 4)
Step 7: If your widget is rotated the way you want it then click the rotate controls, which are right above the Scale Object button.
Step 8: Save Your Widget as a .stl file type to a USB thumb-drive
Step 9: Take The USB Stick and plug it into the 3D Printer
Step 10: Print It! (see Figure 5)
Scroll Down For Finished Product If You Dare!
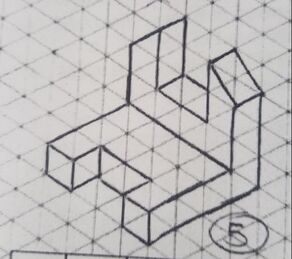
Figure 3
|
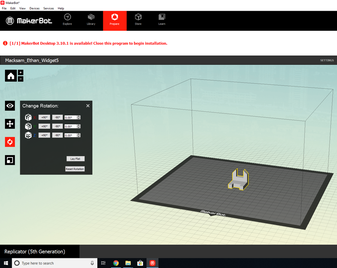
Figure 4
|
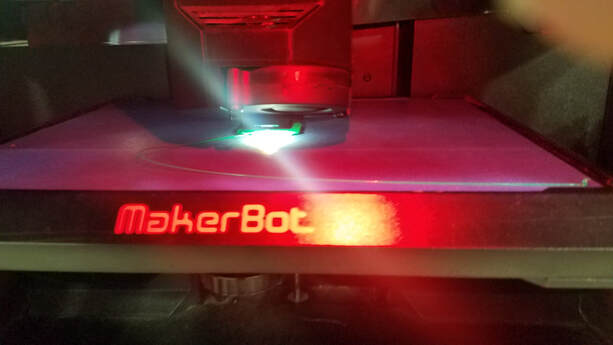
Figure 5
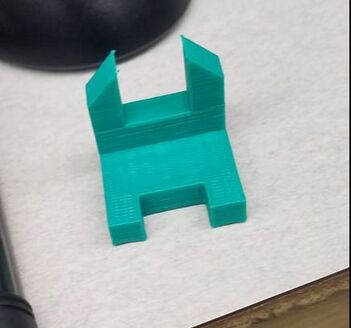
Taa Daa!
Summary
What I learned how to do use Inventor along with Makerbot to help 3D Print awesome objects!
